Craftsman

Hello and welcome to my Woodworking page.

Antique Doors by Mark Slater

Here is an in depth description of my restorative process.

letterfold inside

The following images are a visual diary of my wood door and wood accoutrement  restorative skills and projects.

Spring 2015

Ernest Albert Coxhead

National Register #00000322

This is my latest door restoration project; the Ernest Albert Coxhead house in San Mateo, CA.,
National Register # 00000322.  After finishing this project I ascertained that the front door hadn’t been its original color for some time.  The following pictures are its miraculous change, back to its original natural color and luster.  The door was made of quarter sawn California White Oak.  All hardware appeared to be custom made just for this door.  Enjoy

37 E

beginning October 2014

restored door

May 2015

This time I am going to show you the before
and then the after.  The following images are
details of the door and my process of
restoration.

Through out the restoration process I use
hand tools and a few motorized sanders.
That is it, no chemicals were used to take
off the old finishes.  Just sweat, tears
and TLC.

IMG_0834

door bell

DSCN1391

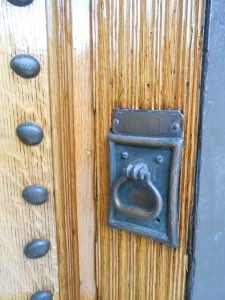
close up of restored door bell

This is the right side of the door.  That long strip in the middle is hidden when the door is closed.

IMG_0836

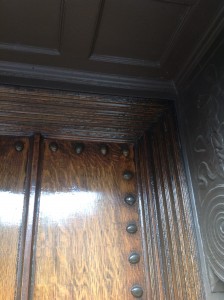
Upper corner of door before restoration

DSCN1394

The door after in its closed position.

DSCN1395

door open

DSCN1358

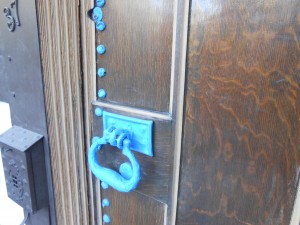
Custom door handle before

DSCN1366

during the sanding process

DSCN1380

All finished literally and figuratively

frame 1

Summer 2014 before works begin.

frame 2

All precious metallic parts are now covered and starting from the top and going to the bottom.

frame 3

It takes longer than you think. I go from 60 grit (sometimes 40) all of the way to 220 grit, in 20 to 30 grit increments.

frame 4

The door/ building casing is now sealed.

frame 5

Now to tackle/embrace the door.

frame 6

Lots of detail on that door molding. Clams, mushroom/star thing and then beads of mahogany on a separate row.

DSCN0064

My Festool friends. Hand sanding block, hand sanding block with vac hook-up, motorized variable speed sander and HEPA EPA certified vacuum.

Image05192014092243

See, it is pretty weathered.

DSCN0148

I had to get a special cemented carbide tipped scraper for that so very detailed molding(s). The maker’s name is Bahco, made in Sweden.

Bahco website, It is part of the Ergo series, tool #625.

DSCN0079

That’s better.

frame 7

I have it all scraped, now to seal it.

frame 8

Sealed

once more; before

frame 1

and after

DSCN0147

All finished, Now, at least 2 coats every Summer and this door should look beautiful for years to come.

Spring 2014

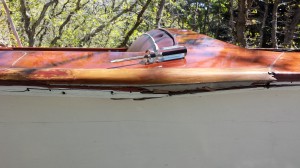
This is a 1957 Higgins boat that I worked on during the first days of May 2014.  Long story short..It was a relatives and a personal acquaintance of mine acquired it and as of now is in the process of becoming seaworthy.  My project objective while I was at the boat’s new home, was to take care  of some cosmetic and structural damage on the vessel’s left side.  As well as get a few coats of finish on before I went back home.  Like any good project it was hard to not run out of time, but in the end it was all worth it!

All good stories start like this.

All good stories start like this.

getting some sun

getting some sun

Reference from the other side

Reference from the other side

What it looks like on the other side.

get-attachment-1

minus the foot plate.

all apart

all apart

I would like to point out at this juncture, that the individuals or individual that last did repair work had to have been 23-33 years ago and they were not amateurs.  There was no logbook to my knowledge and I really don’t know what happened to the boat that made this type of damage?  My mission on site was to pull it apart, clean it up and then put it back together…Easy…Right?

Not so much.

put the chunk back in

put the chunk back in

It was like a crime scene at times, taking steps backward to figure out what happened and what to do next?

1 clamp

1 clamp

I started off with one clamp.  Bad idea, note to self; never buy one clamp!  Always buy them in pairs.  I started gluing it back together from Left to Right with epoxy that I got to pigment it with some color, that is why it is red…  I knew I was going to need more clamps for tomorrow, but this was a good start for day 1.

all sides

all sides

I had to keep in account of not only  fixing the damage  but as well make sure that I suck it up back together to where it should be and not where it was.

almost finished

almost finished

I had to do it in 4 stages..4 separate days of gluing sections back together.

mahogany triangle spline

mahogany triangle spline

After gluing everything together.  I had a nice gap..I could either fill it up with more epoxy, more Bondo, PC-11 or Hand hew and widdle a piece of mahogany to perfectly fit into the gap.  Keep in mind, this will not be seen when it will all be put back together with the aluminium runner.  I figured the flex of the mahogany spline should help with the constant bouncing and jarring of the boat as it is being used.

It took me a day to cut, hew and sand it so it would fit like a glove.

The razor blade is there for size reference.  I used a hand saw to hew it in half and then I just widdled it down to what you see below.

hand hewn

hand hewn

Thanks to Ellis Planing Mill for sponsoring the Mahogany!

last day of epoxy

last day of epoxy

It looks like a god awful mess I know.

How’s this?

get-attachment-1a repeat I know, but a good side by side comparison

all spiffed and sanded

all spiffed and sanded

all finished

all finished

so much better

so much better

DSCN0053I was adamant to not stain the original wood that I worked on, when the foot plate is re installed it should look freaking awesome.!!

It took me an estimated 55+ hours in 8 days, I had an assistant that chipped in another solid 10 hours as well.  All worth it at the end of the day.  When you get to work on a piece of history such as this boat there are no complaints.

Image04302014171840

Spring 2012, This was an RV sized garage.  The whole thing wasn’t in this condition.  This was the panel/section with the most weather and water damage.

Before

3

After

5

Final stage of restoration.

natural grain

This is a close up of the bottom Pine piece of the garage.

12

See I told you it was big.!

16

Ok 1 more of this project.

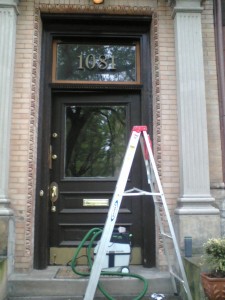
 This was a brownstone in the Back Bay that needed some attention on the door frame and upper address # window.  I did coat the doors as well, but at this point I have not restored the doors.  Yet?

9B

This was all about restoring the original molding contours as it was when it was first installed 100+ years ago.

10

At this point I am only using a hand scraper and some sandpaper. No machines yet. Ok I am using a vacuum and a dust mask

17

I have brought it back to life. Now for a seal coat

18

This is the first of many coats to now be put onto the Oak surface

Another residence in the Back Bay, Massachusetts region:

1081 A

First stage of taking off the old paint, stain and time. This door is probably from 1880’s or early 1890’s.

I use a Festool vacuum.  EPA certified HEPA filter.  Dust extraction is over 90% with that little guy.

1081 B

The natural wood hidden underneath is Mahogany. Mostly Select and Better grade on the door and frame.

1081 F

All coated and ready to shine!

It took just over 120+ hours to complete this.

1081 C

Detail work on mail slot.

1081 D

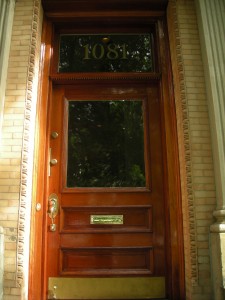
What a difference a lot of TLC does.

OK one more close-up.

notice the reflection from the handle in the door frame.

1081 G

It takes some serious work to make something look that beautiful.  I love doing it though.